Transfer Mint
Outline
We will understand how to transfer a newly created mint in the previous chapter. The final outcome can be found here
To transfer a new mint to an account, use mint_to instruction from token program.
How to transfer the Minted token to an account?
Before transferring an spl_token_mint to an account, it is time to understand about Associated Token Account (ATA).
The spl_token_mint can only be transferred to ATA.
- ATA is normally generated off-chain.
- ATA is PDA. ATA is generated by finding a suitable PDA
- On the client side, one could generate a ATA as follows
Following code is an example ATA generation using PublicKey.findProgramAddress in @solana/web3.js library.
Add find ATA to test file
Add the following in the spl-token.ts test file.
import {PublicKey} from "@solana/web3.js"
import { ASSOCIATED_TOKEN_PROGRAM_ID, TOKEN_PROGRAM_ID } from "@solana/spl-token";

export const findAssociatedTokenAccount = async (
  payerKey: PublicKey,
  mintKey: PublicKey
) => {

  return await PublicKey.findProgramAddress(
    [
      payerKey.toBuffer(), // could be any public key
      TOKEN_PROGRAM_ID.toBuffer(),
      mintKey.toBuffer(),
    ],
   ASSOCIATED_TOKEN_PROGRAM_ID
  );
};
As we can see above, ATA is generated using
- Any public address +
- A mint address +
- Token program ID address +
- Associated Token Program ID.
You should pass ATA to an instruction to transfer a mint. Again, In the program, use mint_to instruction to transfer a newly created mint.
Now, back in the rust lib.rs file, we will write a transfer context and then we will write an instruction to transfer the spl-token-mint` to an ATA.
How to create transfer context?
We create another struct called TransferMint context for transfer_mint instruction.
First update the imports from token library
use anchor_spl::{token::{self, Mint, Token, TokenAccount}, associated_token::AssociatedToken};
Next create the TransferMint context.
// Transfer mint context
#[derive(Accounts)]
pub struct TransferMint<'info> {
    #[account(
        mut,
         seeds = [
            b"spl-token-mint".as_ref(),
         ],
        bump = vault.spl_token_mint_bump,
    )]
    pub spl_token_mint: Account<'info, Mint>, // ---> 1

    #[account(
        seeds = [
            b"vault"
        ],
        bump = vault.bump, // --> 2
    )]
    pub vault : Account<'info, Vault>,

    #[account(
        init,
        payer = payer,
        associated_token::mint = spl_token_mint,
        associated_token::authority = payer
    )]
    pub payer_mint_ata: Box<Account<'info, TokenAccount>>,  // --> 3

    #[account(mut)]
    pub payer: Signer<'info>, // ---> 4

    pub system_program: Program<'info, System>, // ---> 5
    pub token_program: Program<'info, Token>,   // ---> 6

    pub rent: Sysvar<'info, Rent>, // ---> 7

    pub associated_token_program : Program<'info, AssociatedToken>  // ---> 8

}
So here is what's happening the TransferMint context
- We have used the same
spl_token_mintaccount. However, we are not instantiating this time. We use thespl_token_mint_bumpthat was stored inVaultstate previously. - We get the
vaultaccount again by using storedbumpfrom theVaultstate - This time, we are passing an ATA for minting the
spl_token_mintinto thepayer_mint_ataaccount. We are settingassociated_token::minttospl_token_mintandassociated_token::authoritytopayeraccount. - We are passing the
payeraccount from which the program deducts payment token_programaccount is same as beforesystem_programaccount is same as described in the previouslyrentaccount is same as previously. Here we are passing rent for creatingassociated token accountassociated_token_programaccount is passed for creating ATA.
We will now create an instruction transfer_mint to transfer the spl_token_mint into an ATA.
We use the mint_to instruction from token_program. We will call the instruction via cross program invocation (CPI) to another program. Learn more about this here
    pub fn transfer_mint(ctx : Context<TransferMint>) -> Result<()> {
        let cpi_context = CpiContext::new(
            ctx.accounts.token_program.to_account_info(),
            token::MintTo {
                mint: ctx.accounts.spl_token_mint.to_account_info(),
                to: ctx.accounts.payer_mint_ata.to_account_info(),
                authority: ctx.accounts.payer.to_account_info(),
            },
        );
        token::mint_to(cpi_context, 10)?; // we are minting 10 tokens
        Ok(())
    }
With this, the spl_token_mint is minted into the payer_mint_ata account.
Let us test this out by writing another test case in spl-token.ts file. Let's update the file like it shown below.
// add this block into the describe block of the test file
it("should mint the spl-token-mint to payer_mint_ata", async () => {
    const [splTokenMint, _1] = await findSplTokenMintAddress();

    const [vaultMint, _2] = await findVaultAddress();

    const [payerMintAta, _3] = await findAssociatedTokenAccount(
      payer.publicKey,
      splTokenMint
    );

    const tx = await program.methods
      .transferMint()
      .accounts({
        splTokenMint: splTokenMint,
        vault: vaultMint,
        associatedTokenProgram: ASSOCIATED_TOKEN_PROGRAM_ID,
        tokenProgram: TOKEN_PROGRAM_ID,
        systemProgram: SystemProgram.programId,
        payerMintAta: payerMintAta,
        payer: payer.publicKey,
      })
      .signers([payer])
      .rpc();

    console.log("Your transaction signature", tx);
  });
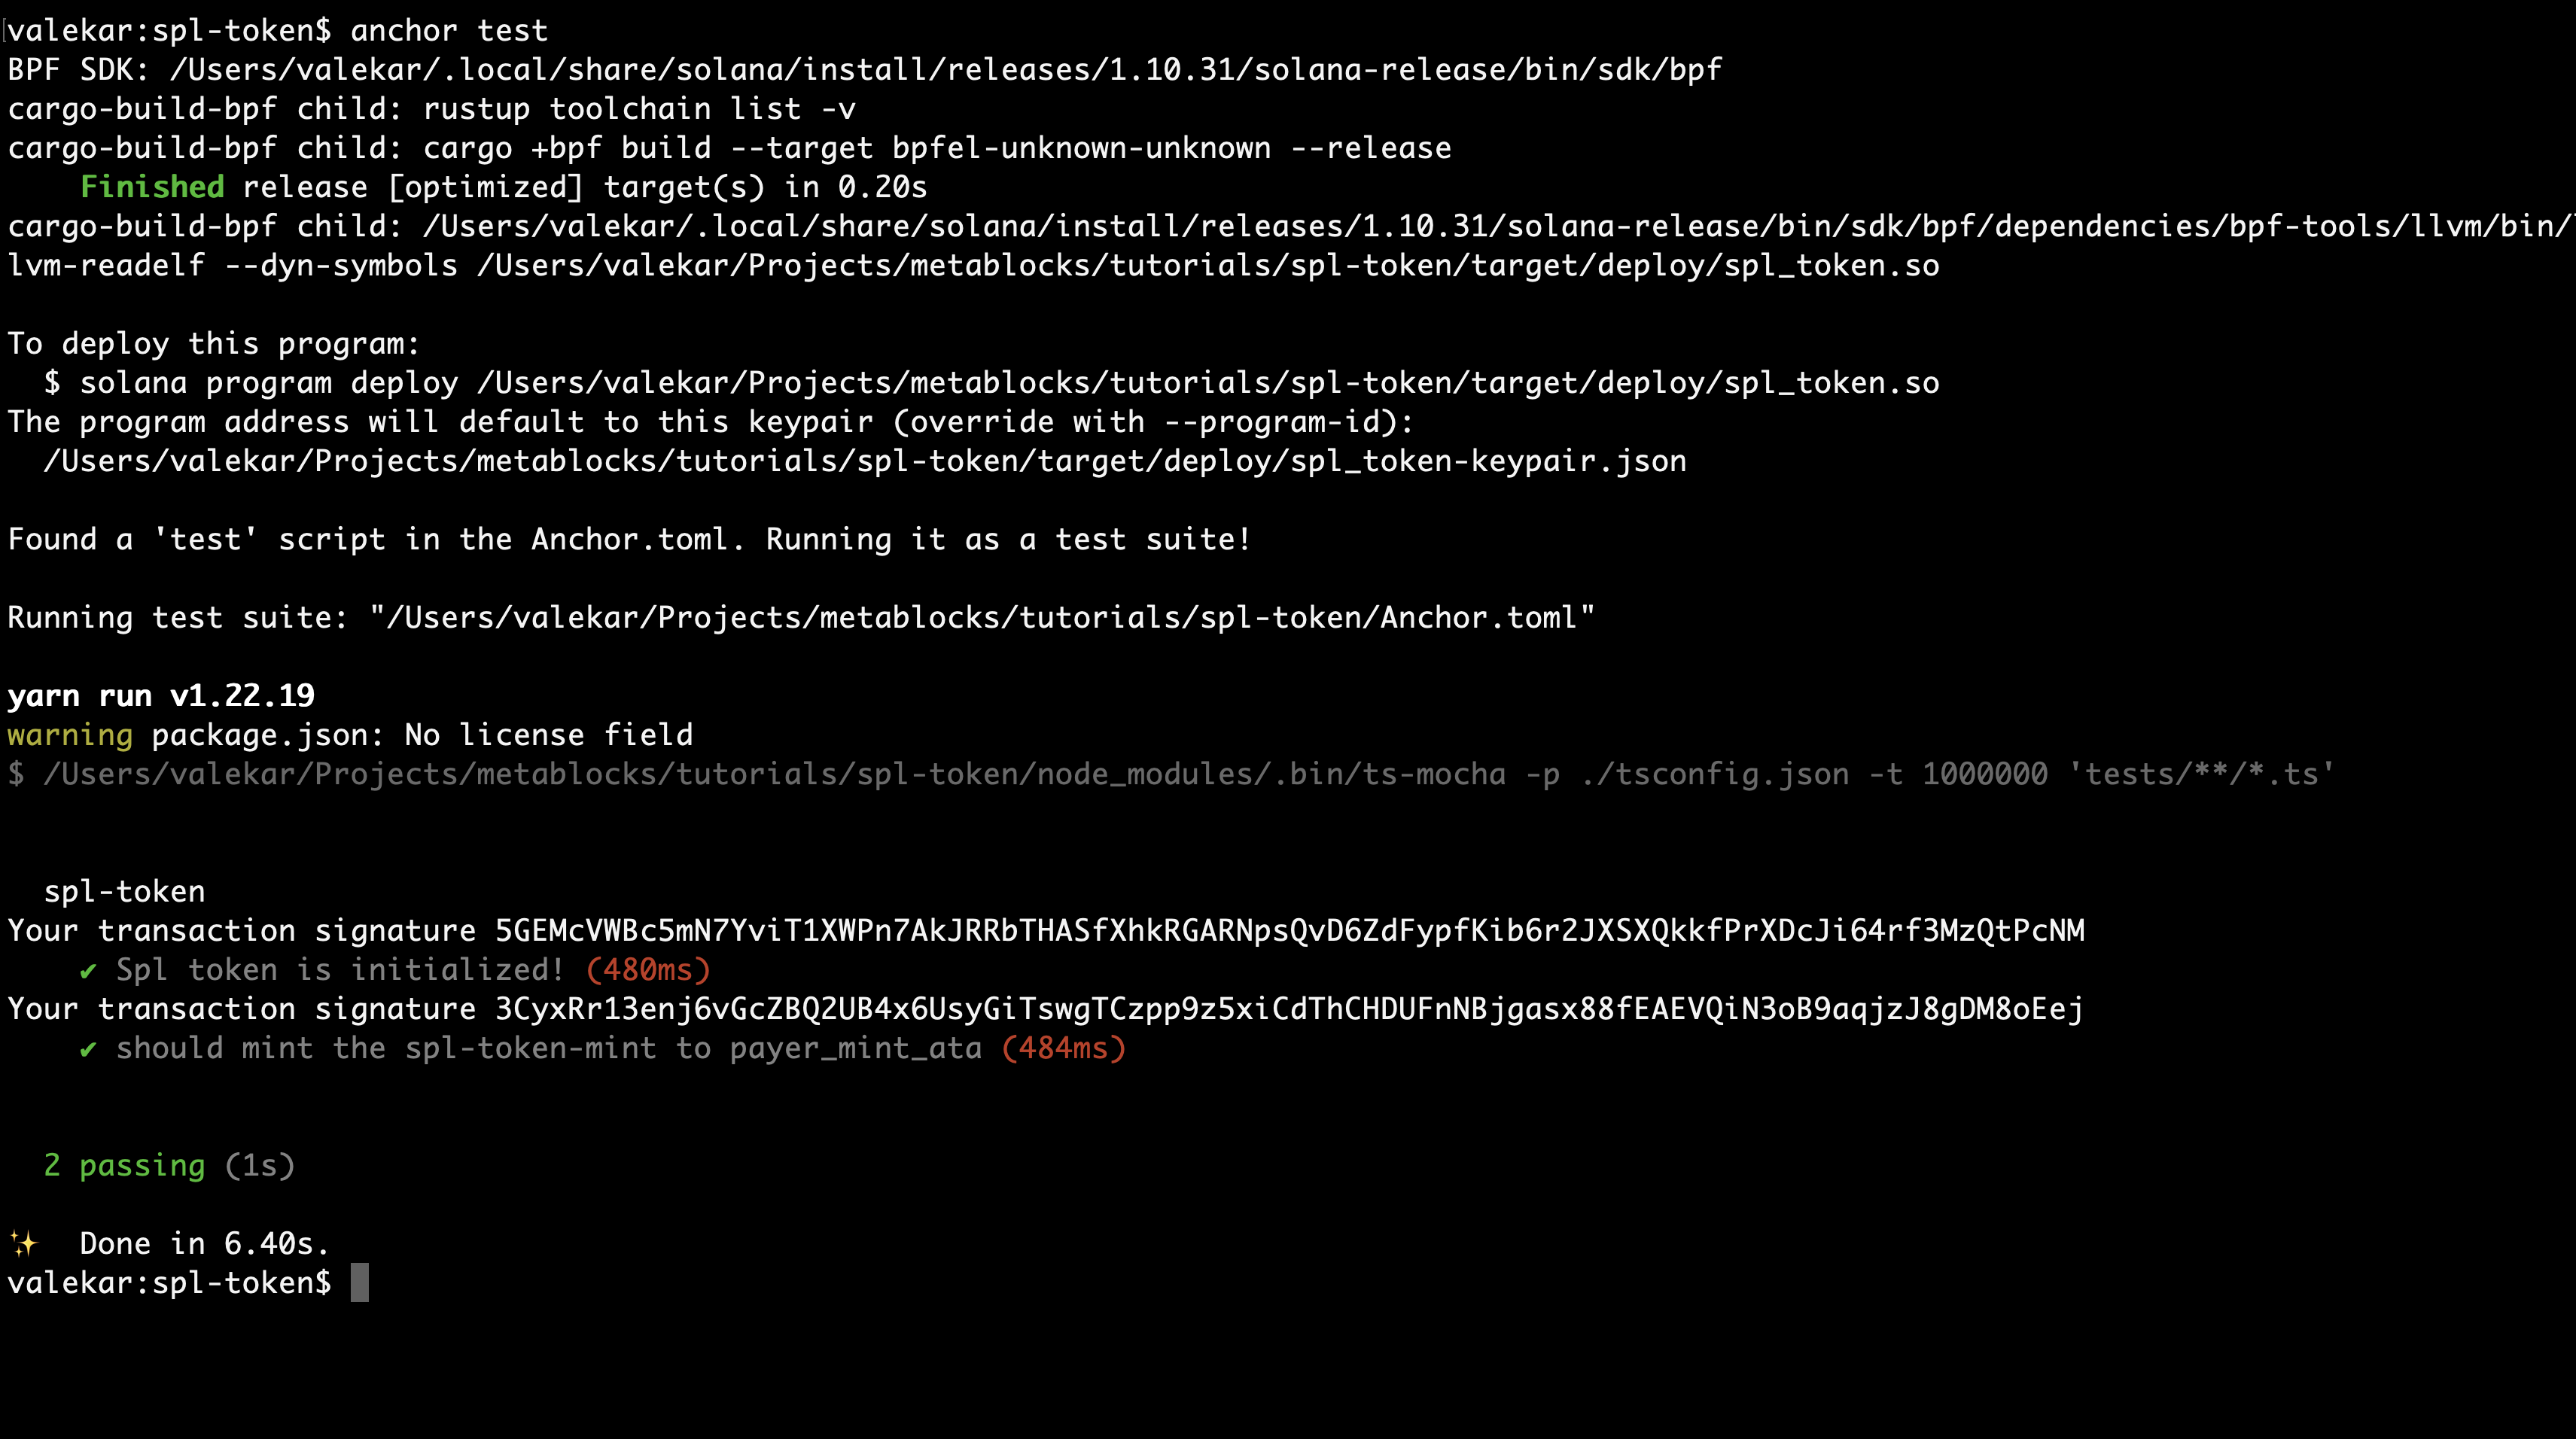
Run the command
anchor test
After this, you should be able to see the result like below.

With this, we have understood how to use mint_to to transfer new mint. In the next chapter we will discuss on how to transfer tokens between accounts.